Taking attendance with app
1. To install the app on your device (iOS and Android only), key in your app’s URL link into the web browser on your device. (If you are not sure about the Attendance App URL, please email us at support@nextlogic.com.sg)
Once the app is loaded on your device in the web browser, create a shortcut and place is on your Home Screen so you can access it easily.
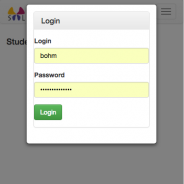
2. User needs to login into the app. Username and password is the same as to the back-end of the system.

3. To take attendance quickly and easily click on Attendance tab in the menu.

4. By default the attendance screen for today only would appear. You can tick “Only Mine” if you want to filter out only classes assigned to you in the back-end. Use arrows next to date field to move to different days, if needed.

5. Click on the class for which you want to take attendance. The list of students who are supposed to attend this class would be listed with their respective attendance status.

6. Tick on all students you want to update to “Attended” for example and select status “Set to Attended” from the “Set Status” in the menu above the list of students. You do not need to save and update attendance one by one.

7. New status is automatically saved. If that’s all you want to do, log out of the app to make sure that your user license is not preventing other users from using the system.

|